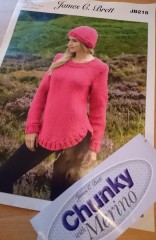
 About 18 months ago I started on the first knitting project I’d attempted since my school days, when I started knitting myself a scarf that quickly turned into a scarf for my dolls as I got bored with its slow progress. In December 2014, after adding some knitting blogs to my Feedly app, I decided that I like the idea of having a project that I could do in the evenings while listening to the radio and podcasts with my boyfriend, rather than being hidden away in my sewing cave. One of my favourite fabric stalls at Leeds Market (B&M Fabrics) had recently opened up a shop on the outside of the Kirkgate Market building, and expanded to sell knitting supplies. I picked what I thought would be a good beginners’ pattern (James C Brett – JB218) and some lovely soft jade green chunky wool (with Merino) and set about relearning how to knit.
I couldn’t remember anything from my youthful attempts at knitting, so I had to start from the beginning, teaching myself how to hold the needles, cast on, knit, purl and what the abbreviations in the pattern meant. Using some basic instructions that my mum had collected in the 1980s as a weekly subscription, and searching the internet whenever I got stuck, I managed to get myself started with the front body piece. It was slow going and I had to restart several times before I had successfully cast on and worked even a few rows. Just as I thought I was getting the hang of it I lost concentration and then something odd happened to my stitches.
I had no idea what I’d done, but I didn’t think it looked right, although I really didn’t know how it should look. I quickly realised that trying to listen to a podcast at the same time wasn’t helping. Then I dropped a stich – well I thought I’d dropped a stitch, but I couldn’t be sure. I increased my stitches by one in the next row just in case. It wasn’t looking very even so decided to make this my back piece – I was happy with it being a bit rough as it was my first attempt at a jumper.
Eventually, my first piece was complete, except for the curved bottom and the neck trim, which are both added at a later stage. Despite my hiccups along the way I was satisfied with my progress and looking forward to the front. Everything went very smoothly with this next piece and I soon had the front complete. Then I compared the two pieces. My front was so much neater and more regular than the back, and it had been completed so much more quickly. I had plenty of wool and so I decided to make a second back. This came along nice and quickly, and I thought I’d easily have the jumper completed within a month.
Next came the sleeves and tackling two by two rib. I had to cast this on at least eight times, as my first few attempts looked a complete mess, then I kept getting distracted and losing my place in the pattern. At some point in the first cuff I lost interest and the project was put to one side for several months.
Eventually, I came back to it and persevered until I had a nice looking ribbed cuff. I popped this off onto a spare needle, and then completed the other cuff the same day while I could still remember what I was doing. The rest of both sleeves came together nicely and I was really starting to enjoy the meditative effect of knitting. Then came the trim. I thought I’d picked a nice easy pattern, but this was where I became aware that it wasn’t. At the bottom of the jumper you had to pick up stiches so you could knit a two by two rib curved bottom onto the jumper. I started haphazardly picking up stitches, and before I was halfway along the curve I had more than the number of stitches advised, so I let it unravel and tried again. After several attempts I wasn’t getting anywhere. The bottom of the jumper was all stretched out of shape and any trim I’d managed to get on the bottom looked terrible. I was losing my patience, and so again I put it away – this time for over a year.
 It was now July 2016 – over 18 months since I first started this jumper, and it hadn’t turned out how I had hoped. My previous work contract had finished on 30 June and I had been using my summer break to catch up on other projects and complete some UFOs (Unfinished Objects). This seemed like the perfect time to deal with this jumper once and for all. I decided I was going to complete it, and in the worst case it would be a ‘house jumper’ – the wool is lovely and soft, so it would be great to wear, even if it looked a mess. I had a quick practice on the first back piece to try to get the trim even – this time marking out lengths of six stitches so I could space them more evenly, then I leapt into the real back piece. I managed to get most of the stitches that I needed picked up, but I lost track of the two by two rib somewhere along the rows and ended up with a strange shifted pattern. I completed the trim and then moved onto the front.
This came more easily and I managed to keep track of the rib to get the right effect. I joined one of the shoulders and created the same two by two rib around the neck, then hand-stitched all the bits together. The stitching was simple enough, and before I realised it I had my completed jumper. It was better than I could have hoped. I had some small holes at the neckline, but they would be fixed with a quick stitch or two, and the back trim was odd, but not too noticeable. The pattern is ‘super chunky’, but the wool is just ‘chunky’, which may explain the problems I had picking up stitches for the trim and the holes at the neck line, and the whole jumper is quite loosely knit. But that’s ok – I’ll use it as a winter layering jumper. I’ll happily wear it out in public, and will proudly tell people it’s my first handmade jumper. It’s just a shame we’re in the middle of a heatwave here in England.
 Do you ever make clothes that are not fit for your current season, or do you try to make sure that they can be worn immediately?
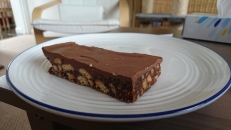
Oh, and I made Tiffin. Mmmmmm!
Jx


")

")


")


")

")
")

")
")


")


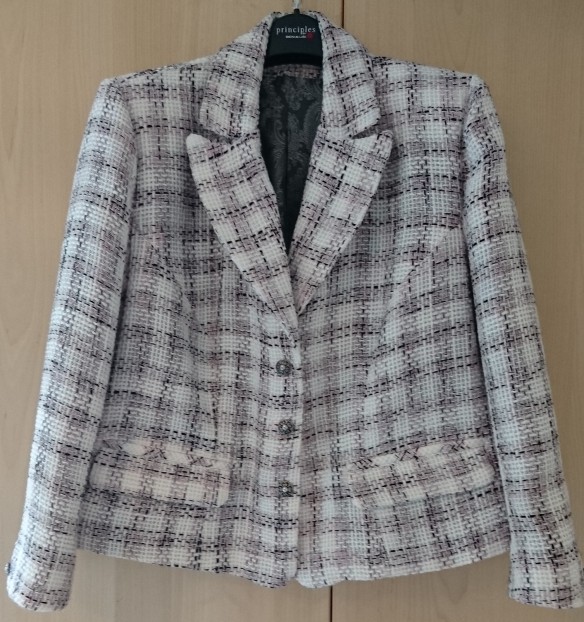 I really love this jacket, but I’m not sure if I’ll dare wear it out and about for fear of damaging it. This was my biggest challenge and my biggest success to date. It’s too hot to wear it here right now, so I have some time to get over my fear, and just enjoy it.

 I’d had plans for a sewing date with my friend Catherine, who has just started sewing, and so we decided to both make an Appleton Dress. Due to lack of space, and general chatter and tea drinking time, we only got as far as cutting out our pieces, so no actual sewing was done on this sewing date. It was still great fun and to be repeated when we can synchronise diaries again.
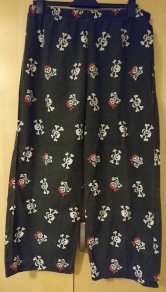 When I came across this fabric on the